Local MCP
Our open-source server wa-bridge-mcp runs on your own computer and connects one number with its API token. It can do everything the Cloud MCP can, plus files, voice notes and media download.
Use it with Muse, Claude Desktop, Claude Code, Cursor or any agent that runs MCP servers. Each number needs its own server and token. There's no access level here: the token can read and send everything on its number.
Muse
Muse connects through our open-source server, with the API token of one number. Muse sets the server up on its own computer, so there's nothing for you to install. Each number needs its own connection.
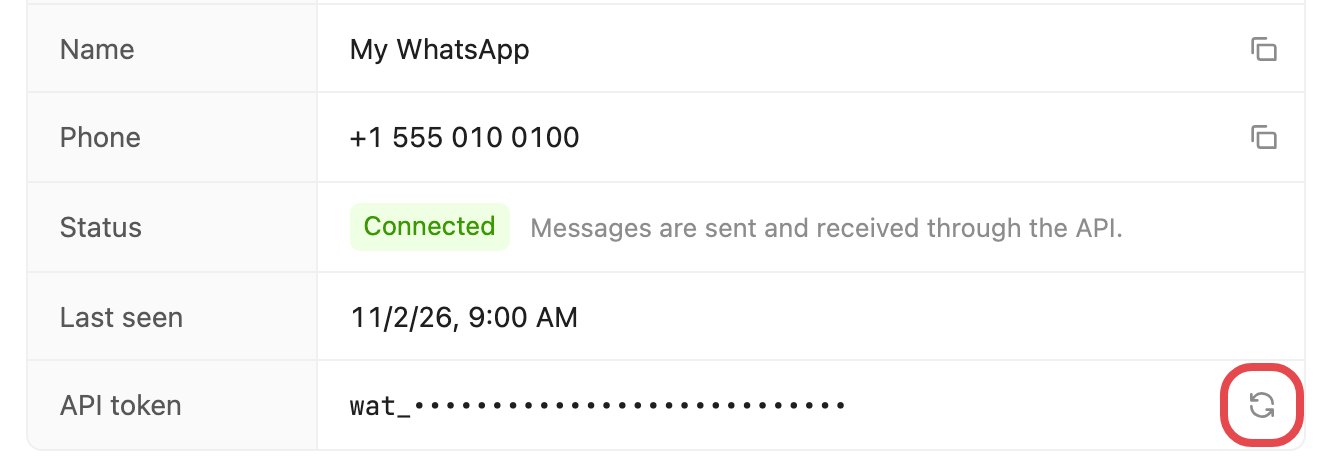
Step 1. Open your number's page in the portal. In the API token row, choose the round arrow at the end of the row.
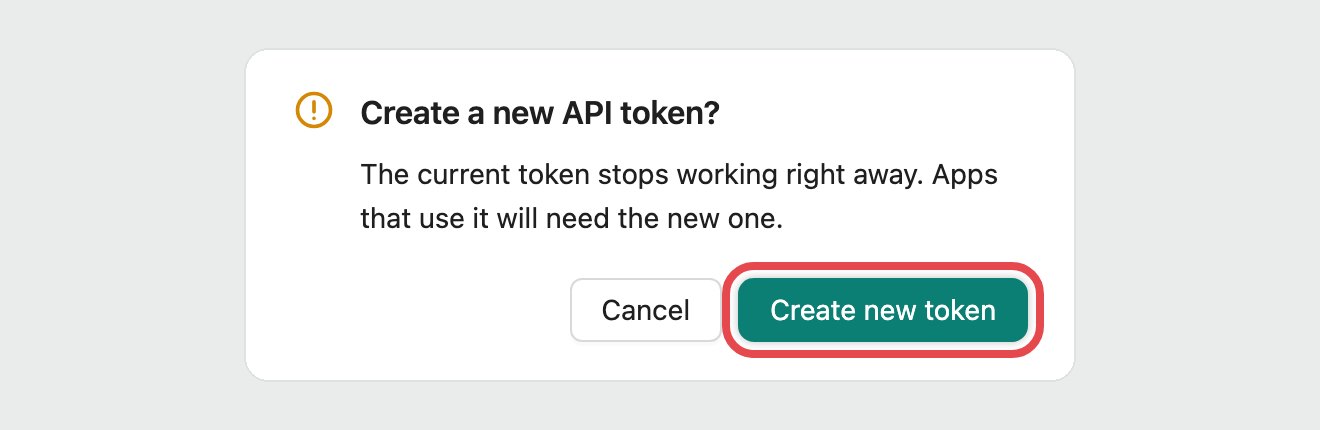
Step 2. Choose Create new token. The current token stops working right away, so apps that use it will need the new one.
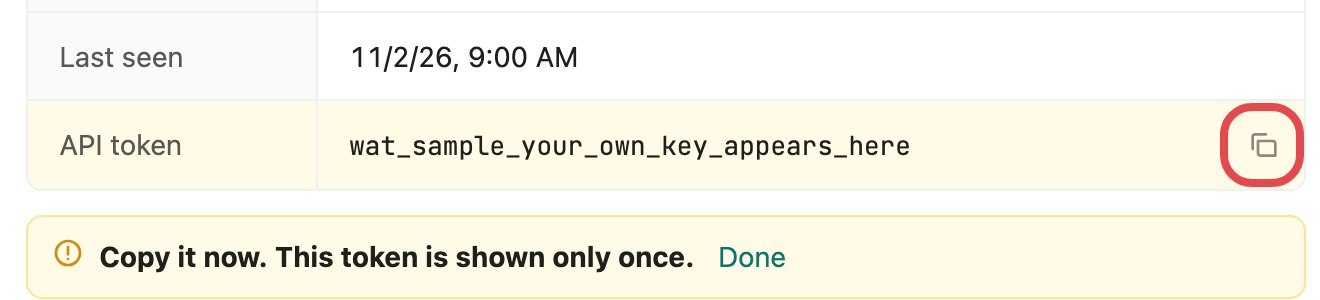
Step 3. Your token appears. Copy it right away, because it's shown only once.
Step 4. Open Muse, then paste and send this message:
Connect my WhatsApp: https://github.com/yehudashtein/wa-bridge-mcp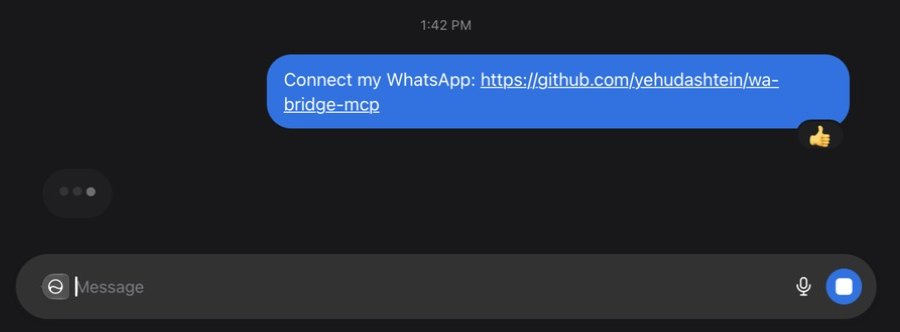
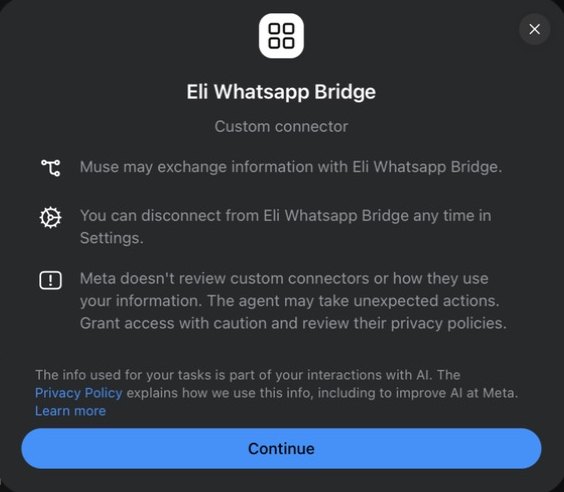
Step 5. Muse does the rest and shows a connector with a Connect button. Choose Connect, then Continue. Muse names the connector itself, so yours may have a different name.
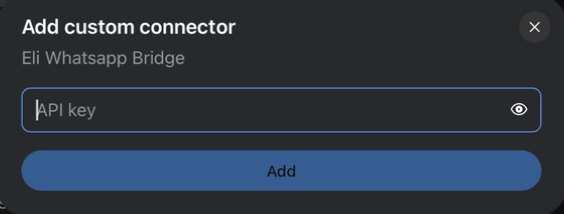
Step 6. Paste the token into the API key box and choose Add. Never send the token as a normal chat message.
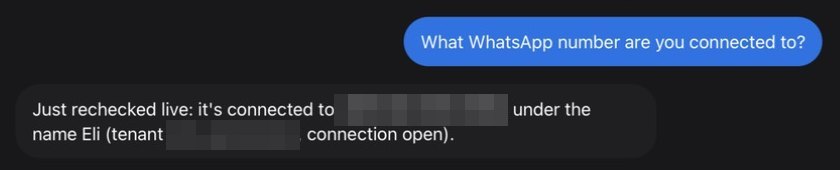
Step 7. Ask Muse in plain words, like "What WhatsApp number are you connected to?" or "What did I miss in the class group?"
Keep the token private. It can read and send this number's messages, so treat it like a password. If it leaks, create a new token and the old one stops working.
Before you set it up
You need two things from the number's page in the portal:
| Value | Where |
|---|---|
| API URL | API URL row — use it as https://api.api-supp.com/v1 |
| API token | API token row → Create new token (wat_…, shown once) |
The server is a small Python app run with uv. Without Muse, there are two ways to set it up.
Set it up with your coding agent
If you already use a coding agent (Claude Code, Cursor, etc.), paste it a prompt like this and let it handle the install and config:
Set up the WhatsApp MCP server from https://github.com/yehudashtein/wa-bridge-mcp.
It's a Python app run with `uv`. If git, `uv`, or Python 3.11+ aren't installed,
install them first (uv can install Python). Clone the repo somewhere sensible and
install it with `uv sync`. Then add it to my MCP config as a server named
"whatsapp" with WHATSAPP_BRIDGE_URL = https://api.api-supp.com/v1. For the token, put a
placeholder WHATSAPP_BRIDGE_TOKEN = wat_PASTE_YOUR_TOKEN_HERE in the config and
tell me the file path so I can paste my own token in — do NOT ask me to share my
token in this chat. After I've added it, tell me to restart so the tools load.
The agent clones the repo, installs it, and writes the config with a placeholder token. You then open that config file and paste your own token into the WHATSAPP_BRIDGE_TOKEN value — so your token goes only into your local config, never into the chat.
Set it up yourself
Follow these four steps.
1. Prerequisites (install these if you don't have them)
You need git (to download the server) and uv (which runs it and installs Python for you). If git --version and uv --version both work, skip to step 2.
git — download the code. Check with git --version; if it's missing, install it for your system:
macOS:
xcode-select --installDebian / Ubuntu:
sudo apt install gitWindows:
winget install Git.GitOr download it from git-scm.com.
uv — runs the server and can install a suitable Python itself, so you usually don't need to install Python separately.
macOS / Linux:
curl -LsSf https://astral.sh/uv/install.sh | shWindows (PowerShell):
powershell -ExecutionPolicy Bypass -c "irm https://astral.sh/uv/install.ps1 | iex"Close and reopen your terminal, then check: uv --version.
Python 3.11+ — uv handles this for you, but to install it system‑wide run:
uv python install 3.11Prefer to install Python yourself? Get 3.11 or newer from python.org (on Windows, tick "Add Python to PATH" in the installer), then confirm with python3 --version (or python --version on Windows).
2. Get the server
git clone https://github.com/yehudashtein/wa-bridge-mcp.git
cd wa-bridge-mcp
uv sync
Note the full path you cloned into — you'll need it in the config below (run pwd on macOS/Linux, or cd on Windows, to print it).
3. Add it to your agent's MCP config
Add this block to Claude Desktop (claude_desktop_config.json), Claude Code (.claude.json), or your editor's MCP settings:
{
  "mcpServers": {
    "whatsapp": {
      "command": "uv",
      "args": ["--directory", "/absolute/path/to/wa-bridge-mcp", "run", "main.py"],
      "env": {
        "WHATSAPP_BRIDGE_URL": "https://api.api-supp.com/v1",
        "WHATSAPP_BRIDGE_TOKEN": "wat_YOUR_TOKEN"
      }
    }
  }
}
Replace /absolute/path/to/wa-bridge-mcp with the folder from step 2 and wat_YOUR_TOKEN with your token.
4. Restart and test
Restart the agent so it loads the server, then ask it something like *"list my last 5 WhatsApp messages"* or *"send a WhatsApp to 14155550132 saying hello"*.
What your agent can do
29 tools. They do everything in the Cloud MCP list, and two have other names here: list_messages reads messages (read_messages in the cloud) and get_direct_chat_by_contact finds the chat with a phone number (resolve_direct_chat). On top of that:
| Tool | What it does |
|---|---|
send_file | Send an image, video or document |
send_audio_message | Send a voice note. Files that aren't .ogg need ffmpeg on your computer; without it, send them with send_file |
download_media | Save a photo, video, voice note or file someone sent |
whoami | The number this server is connected to (in place of list_numbers) |
Settings
| Variable | Purpose | Default |
|---|---|---|
WHATSAPP_BRIDGE_TOKEN | Your number's API token (wat_…) | — (required) |
WHATSAPP_BRIDGE_URL | The API endpoint | https://api.api-supp.com/v1 |
WHATSAPP_HTTP_TIMEOUT | Request timeout, seconds | 30 |
env block (or a local .env), never in shared chats or code. If it leaks, open the number in the portal and Create new token to revoke the old one instantly.